There are 2 ways to change fonts in WordPress. And your choice will depend upon how comfortable you are with CSS (and coding).
Before we set to changing the font in your WordPress theme, let’s first understand how fonts get fetched for displaying.
How Do WordPress Themes Work With Fonts
WordPress Codex gives a great explanation at how themes work with fonts. You can read it here.
Essentially a WordPress theme designer can choose different fonts for different sections in a theme. So you can expect to see different fonts in the header, footer, sidebar, and even the body.
So your first challenge for changing the font of a specific area of your theme will be to identify the CSS script that’s rendering font for that specific area.
Each theme area comes with a div section that contains the font used within that area. So, the font used in your theme’s sidebar will be found in its div, and so on for the other theme elements. A single font can also be applied across a number of theme areas as in the case of the default Twenty Fifteen theme. So you’ll have to see how your theme is coded to pick the right snippet for editing.
I’m sure most of you have at least one of these three questions at this point –
How Many Fonts Should Be Used?
I did some research and realized that almost everyone recommends using two fonts. That’s typically one for for the headlines and the other one for regular text.
Using too many fonts brings down a site speed. So, stick to two.
Which Fonts to Use?
Choosing a font can be challenging. While most factors are subjective, legibility tops the list. You can find some great font mix-and-match tips here. And this is another handy post listing some of the most legible online fonts.
How to Pair?
You can use a tool like Font Pair for pairing fonts. Just select a combination (e.g. Sans-Serif/Serif) and the tool will suggest complementary fonts available for downloading.
Web Font Blender is another amazing tool for viewing how your shortlisted fonts work with each other. You can also see how a particular blend looks with different font sizes and line heights. Once you save a blend, you can get its CSS code.
So here’s how to change fonts in WordPress:
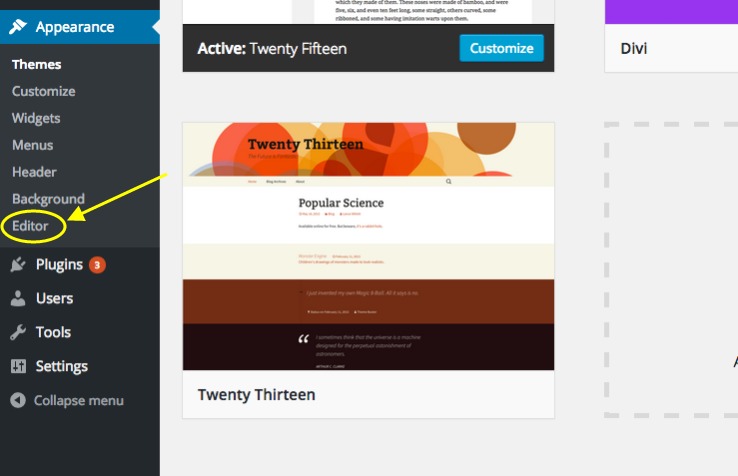
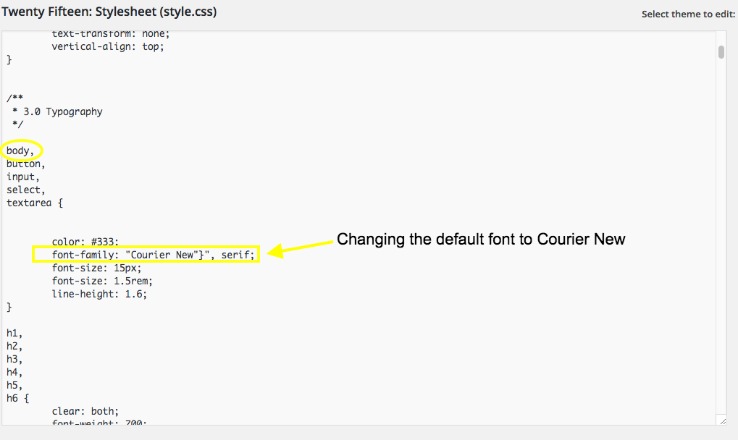
Method 1: Editing the Theme’s Stylesheet
Open the current theme’s editor by clicking on the editor item under the Appearance tab.
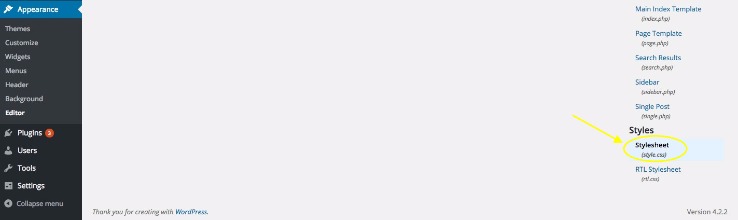
Scroll down and you’ll find the theme’s CSS Stylesheet. Fonts are defined in this part of a theme.
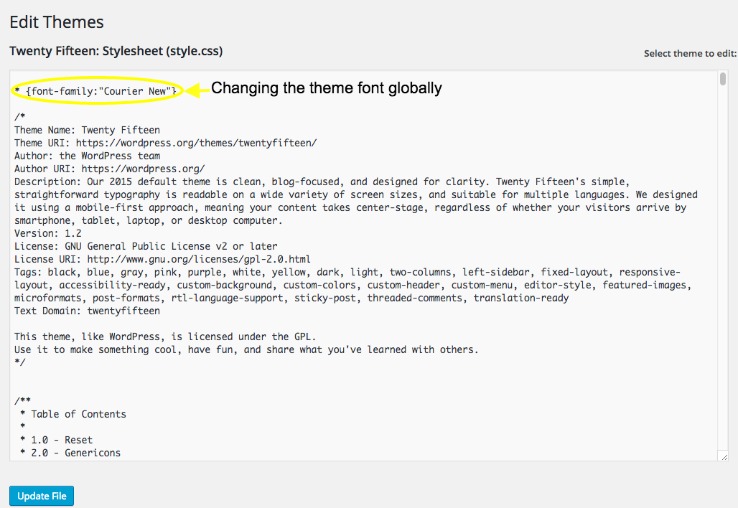
Changing the Font Globally
If you want to change the font globally across your theme, you can just stick this line of code at the top of your Stylesheet:
* {font-family:”Courier New”}
Just change the name of the font to the one that you want to use.
Please note that this is not the best way to do it, but just how good can non-developers get, right?
Changing the Font for Specific Theme Areas
Depending upon the area whose font you want to change, you’ll have to identify the relevant code snippets in the Stylesheet. This can be really painful.
If you want to change the font used in your post’s body, you’ll have to find out where the font style of the body is defined.
Tip: Some themes use lots of fonts. So it will be very difficult to look for the relevant code. To make this easy, I’d recommend you to download the WhatFont extension (I’ve only used it with Google Chrome).
With this extension installed, just hovering on any text on your website will tell you which font is in use in that area. Simply pick this font and search for it in your theme’s Stylesheet. And then you can go ahead with changing it.
Method 2: Using a plugin
If you don’t want to do any coding, you can use a plugin. CSS Hero is easily one of the best options to change the font in different areas of your theme.
If you’re logged in as the admin, you should be able to see a blue icon when you visit your site. Just click on this icon.

This click activates CSS Hero. Now you will have to click on the element that you want to edit.

So, if you want to change the font of your post title, click on it, and you’ll see an array of customization options.
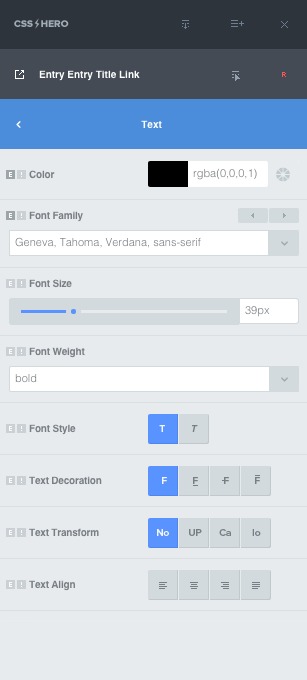
CSS Hero supports a ton of Google fonts. If you can’t find a particular Google font listed in the drop-down menu, just copy and paste its name into the text field.
You also get options to change the color, size, width and alignment of the font. You can also add a background color, borders and padding among other things.

I managed to change the post title font to Georgia, increase its size, and add a background color and margin with a couple of clicks with CSS Hero without any coding.
And the best part is that you get to see the changes as you make them. CSS Hero has a fluid live preview feature that lets you try unlimited variations without the need to go back and forth with steps like saving and previewing.
Have you faced any problems in changing fonts on your WordPress site? Do share in the comments!