One of the most common needs when it comes to editing a WordPress theme is to selectively add custom classes to your elements to adjust their aspect with consistency.
What is a .class?
A class is a collection of properties which extend an element styling.
HTML elements can be identified by a variety of attributes but when it comes to CSS it’s usually down to IDs and CLASSes. An ID identifies ONE and only ONE element on the page (such as #header, #footer, #content and so on) while a class can be added on one or more than one element on each page (.headings, .widgets, .footer-links).
Why are classes so useful?
In web design is very common to share the same style across multiple elements in order to have a consistent style across your website, and here’s where classes can help you.
Assigning the same class to multiple elements on the page will share the class style across those elements while giving you the ability to control the class properties from one single spot, meaning that if you change one of the class properties this will extend to all elements sharing that specific class.
How to add a class? The traditional way
In a world without CSS Hero to do this you should manually add classes to your contents, in the worst situation you should dig into your theme files, look for the code in charge of rendering the element you’re willing to add a class to and modify it. Risky.
How to add a class? The CSS Hero way
With CSS Hero you can easily add classes to elements without needing to touch any of your theme files or adding weird code to your contents. Plus you can control all your classes right from the CSS Hero interface. How? Say hello to Snippets!

Since CSS Hero 3 we’ve dropped CSS and embraced LESSCSS to empower our plugin. From a technical point of view LESS is a CSS pre-processor, it basically has all the CSS features plus a number of life-saving goodies such as variables, nested CSS rules and of course classes. Technically speaking with LESS you can do this kind of tricks:
.myClass{border:3px solid red;}
.myElement{.myClass();}
This basically means that we’re extending .myElement styles with .myClass 😍. Achieving the same result in the traditional way would require you to deal with HTML and edit .myElement as it follows:
<div class="myElement myClass">...</div>
A simple example
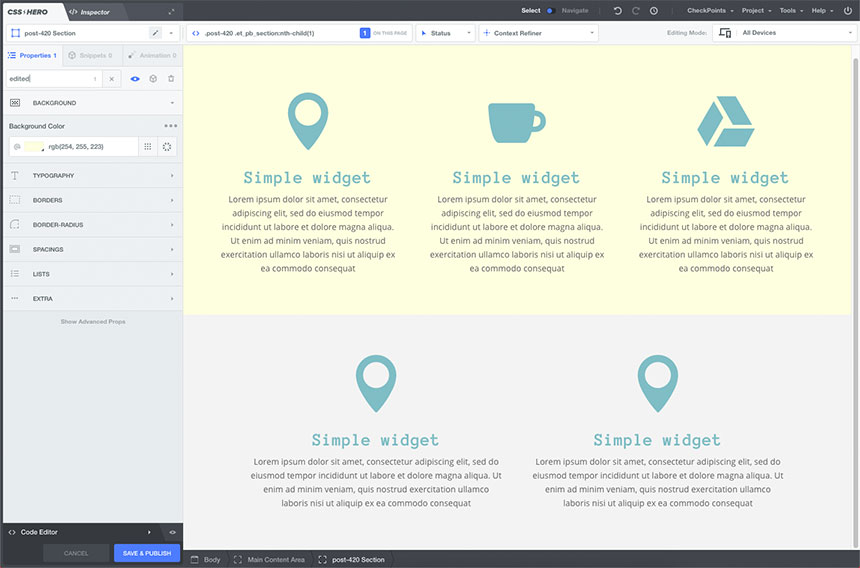
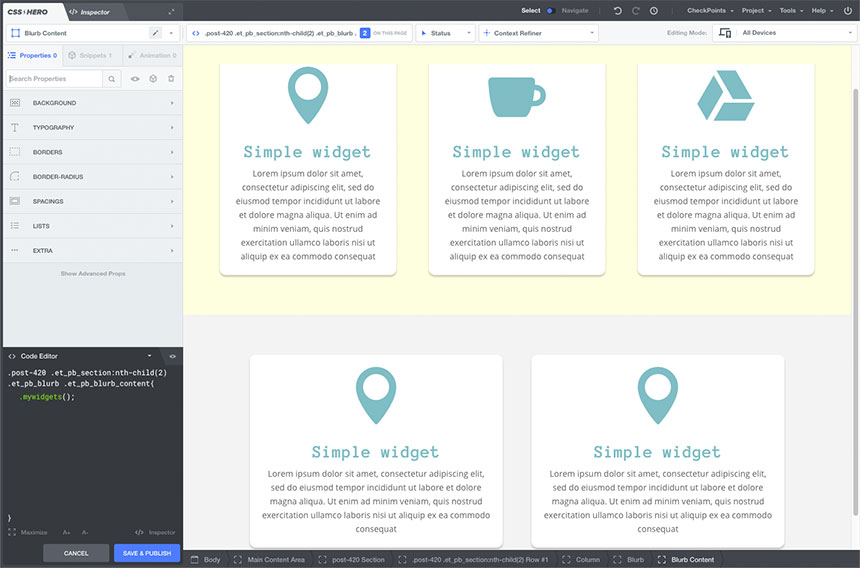
Now let’s see how you can do this with CSS Hero. Here’s a practical example, on this sample page we have 5 widgets sitting in two different rows. This example is on Divi and by default CSS Hero on Divi provides row-specific edits, our goal is to share the same style across the widgets in both rows.
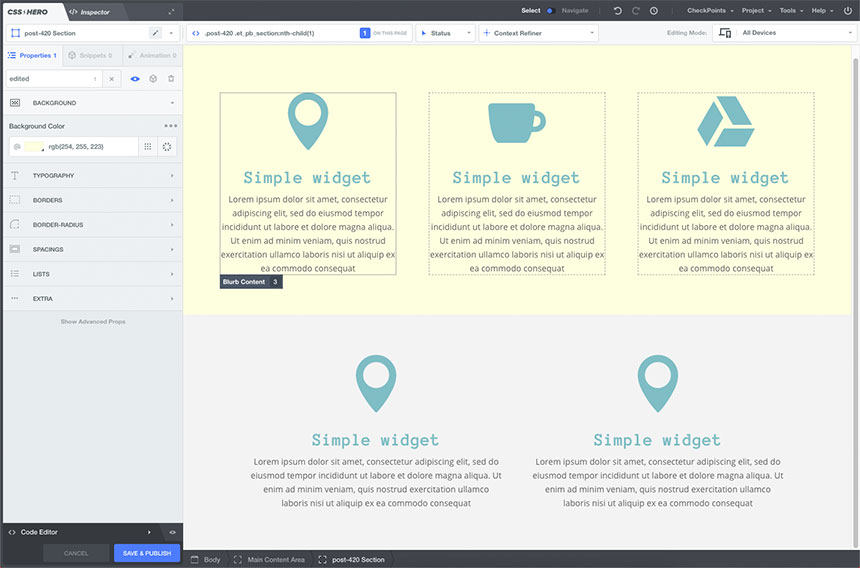
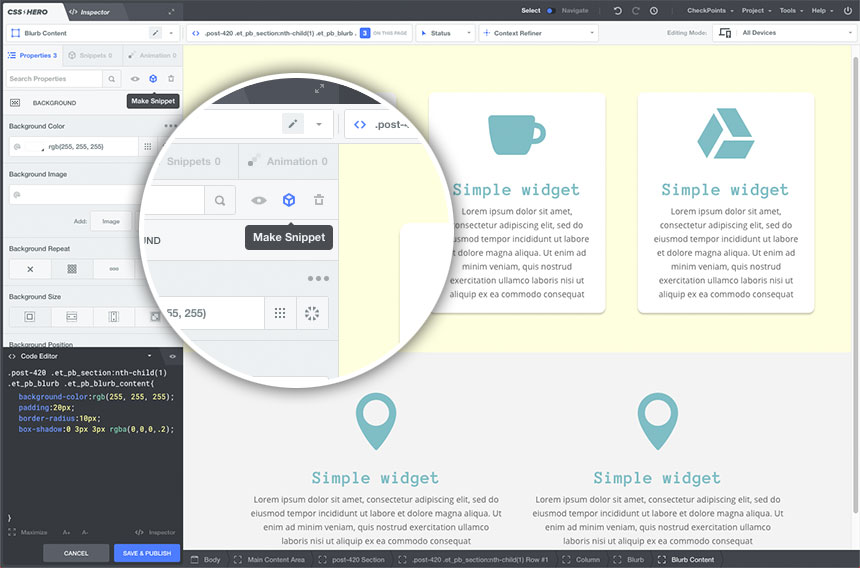
First of all let’s select the element we want to edit, in our case is Blurb Content
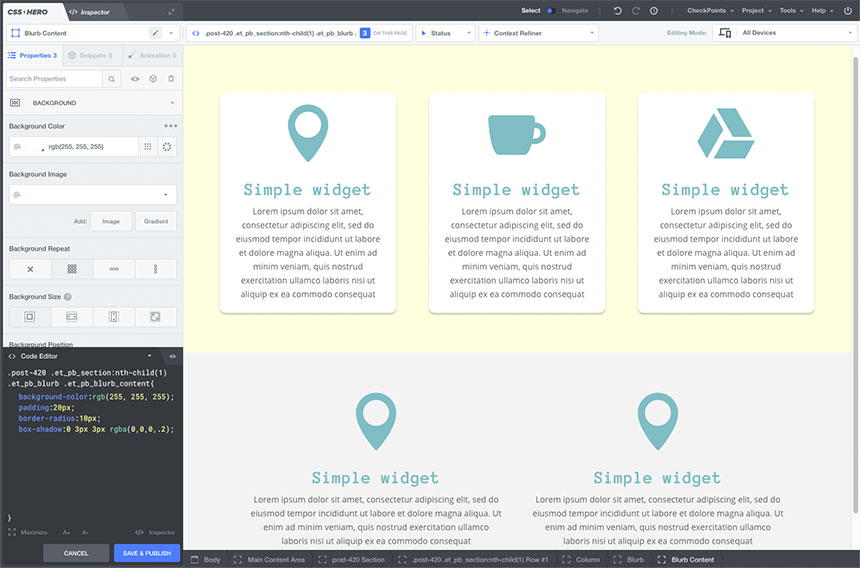
Let’s try to make those Blurbs nicer with a background color, some padding and a subtle shadow
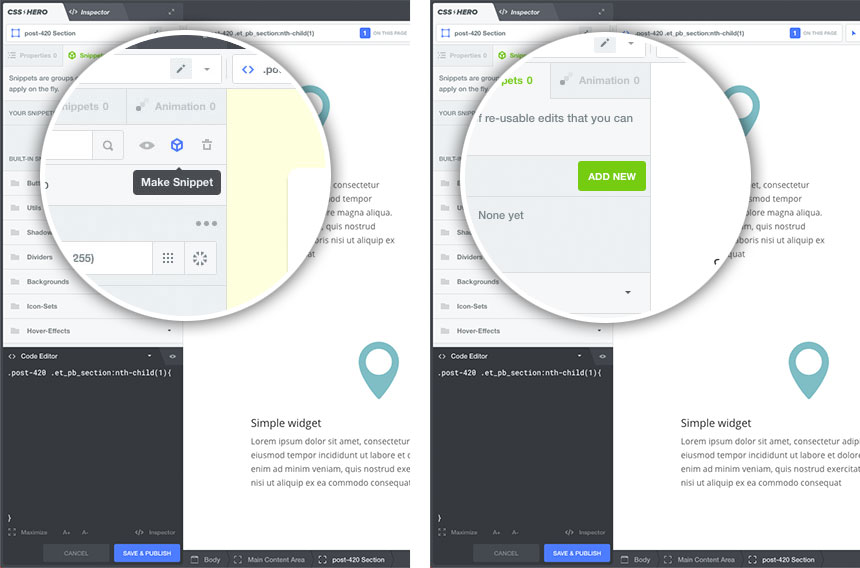
Now that we’re ok with the look of those blurbs we store all the edits we’ve applied into a new Snippet with the Make Snippet shortcut available in CSS Hero:
Let’s choose a name for our snippet and eventually add a category group, if not provided the snippet will be loaded into your My Snippets folder available in the snippets panel.
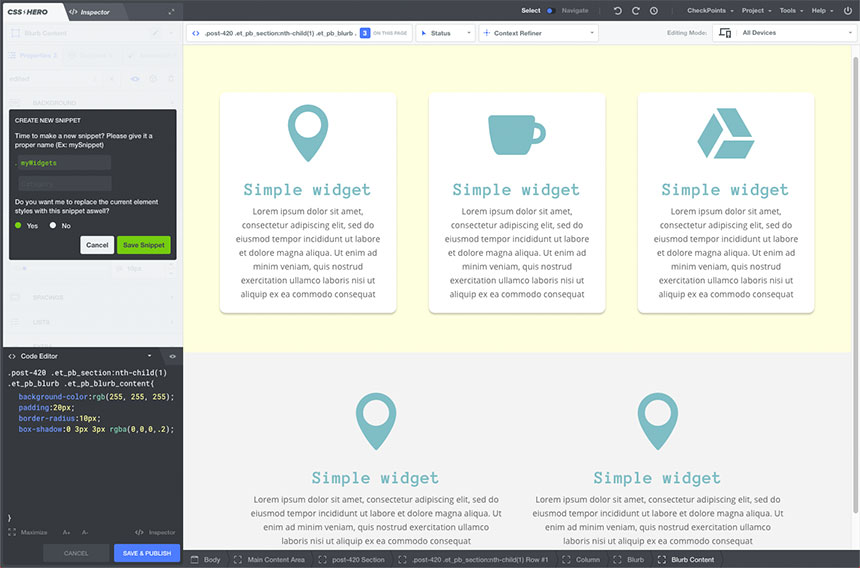
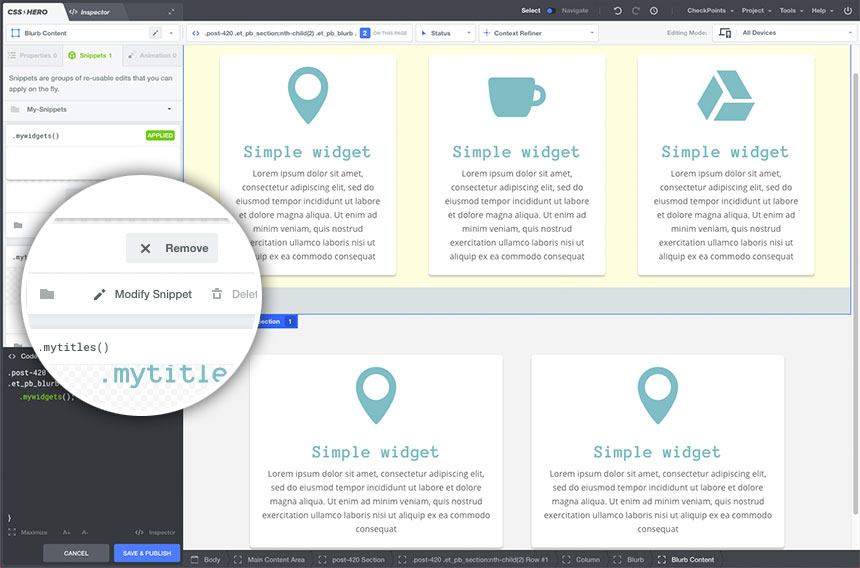
We’re done, mywidgets is now available in our Snippets panel, we can go on and apply it!
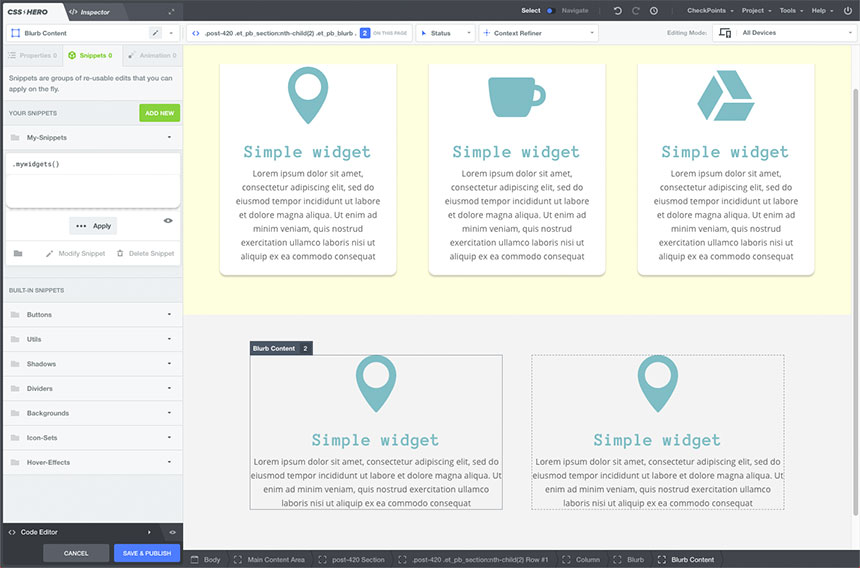
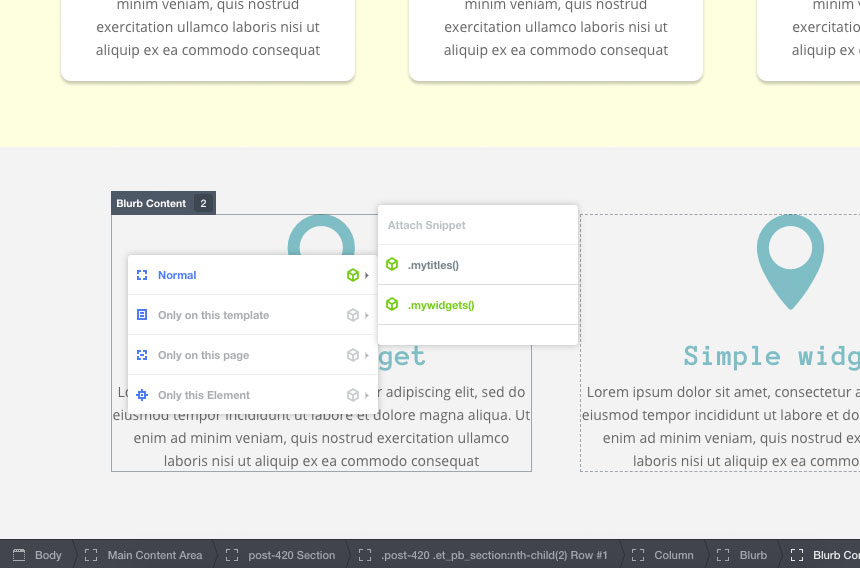
In order to apply it we can either choose to select an element, head to the Snippets panel and apply the snippet or simply by right-clicking an element on the page, choose the context on which we want the snippet to be applied and go!
And voila!
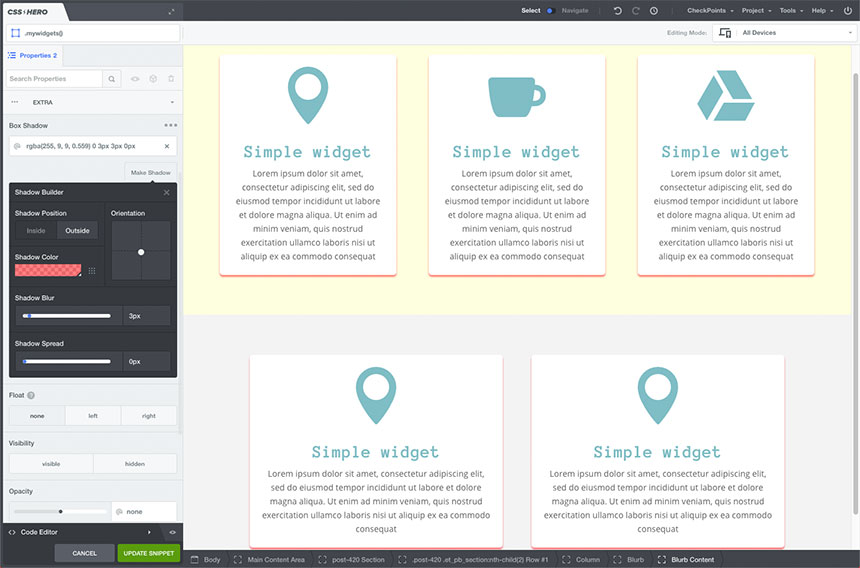
Now the cool thing is that those elements are sharing the same snippet hence we can provide additional edits from the same spot, how? Simply by editing the snippet contents. Let’s assume we want to change the shadow color from grey to red for some weird reason:
In order to modify a snippet, head to the Snippets panel, choose the snippet you want to edit and click Modify Snippet
Now we’re in Editing Snippet mode and we can provide edits to the selected snippet, both via the WYSIWYG interface or by modifying the snippet code, here we’re changing the box-shadow color. Once done hit Update Snippet and you’re done, all the elements sharing that snippet will be updated.
Release the Kraken, enter parametric Snippets
Snippets are powerful, really powerful. Now that you’re a bit more confident with CSS Hero Snippets it’s time to get your hands on parametric Snippets. Huh? Parameters? Yes and you don’t need to be scared, once you’ll get familiar with them you will be asking yourself how could you’ve been living your entire life without them.
Here’s the typical example of a parametric Snippet:
.myTitles(@tint:orange){
color:@tint;
[...]
}
This will basically style all elements sharing the .myTitles class with a color property matching the parameter @tint which by default is set to orange. So applying this snippet to an element as it follows:
h1{.myTitles();}
Will simply make all your h1s orange. Nothing special, but if we provide that snippet with a parameter things will change:
h1{.myTitles(blue);}
will make h1s blue. Now that’s a pretty simple example, let’s see something closer to a real life example:
.myTitles(@tint:orange,@size:32px){
  color:@tint;
  font-size:@size;
  line-height:@size*1.2;
  padding:@size*1.5;
  margin-bottom:@size;
}
This snippet would be super-useful to style all your headings with consistency by setting them a default color and styling all the spacings and measures by the @size value.
Final Thoughts
Snippets can seriously speed up your workflow when it comes to editing complex pages with lots of repeating styles, managing all common styles from one single spot could be a huge time-saver in this scenario. Creating a new snippet is easy, you can either choose to store some elements edits as snippet with the Make Snippet button or create a new one from scratch using the Add New Snippet feature released in CSS Hero 3.4