Borders make the image look more appealing by making the image stand out from the rest of the content on the page. It makes the viewer ‘wander‘ within the image and ‘feel‘ its atmosphere leaving the outer distractions. Feel the difference below:
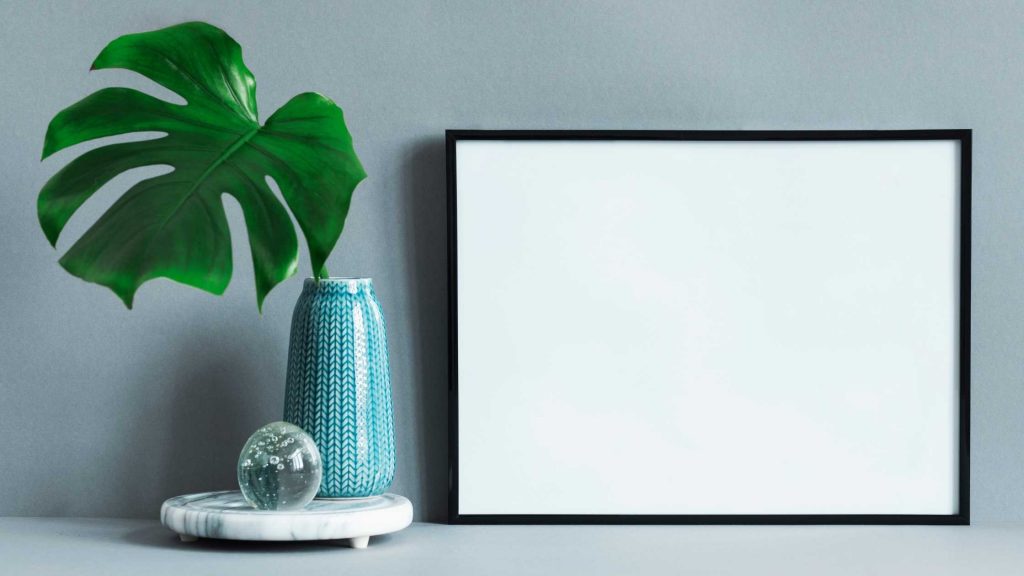
Image with a border:

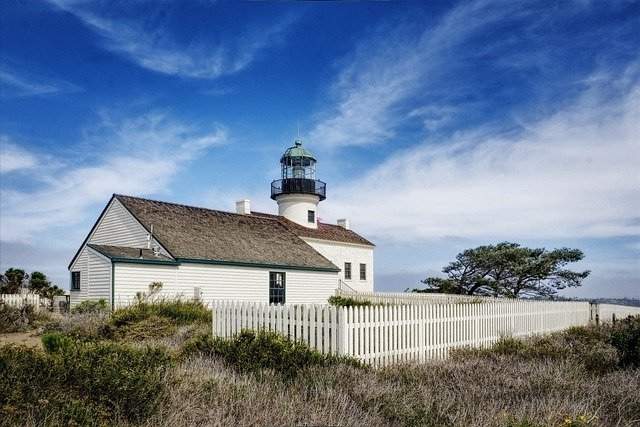
Same image without a border:
You can easily achieve this on your website’s images using CSS Hero editor.
How to do it?
To apply a border to an image with zero or no coding, follow the steps below:
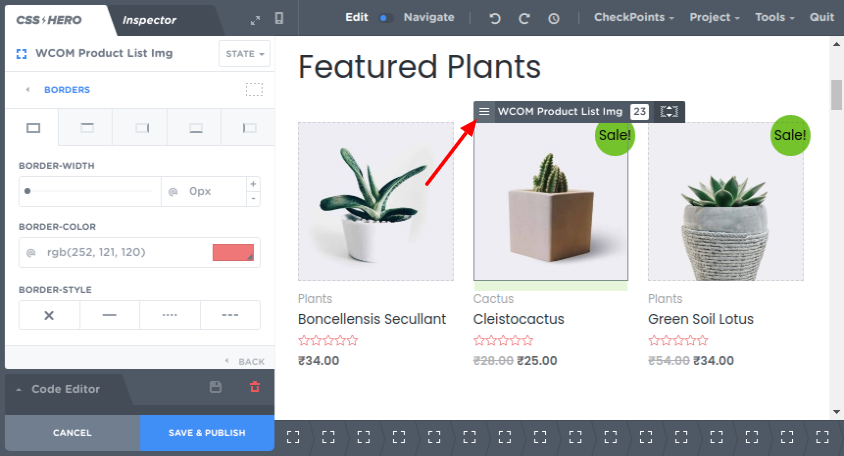
- Launch the CSS Hero Editor.
- Click the image where you want to add a border and then click the Border tab under the Properties.
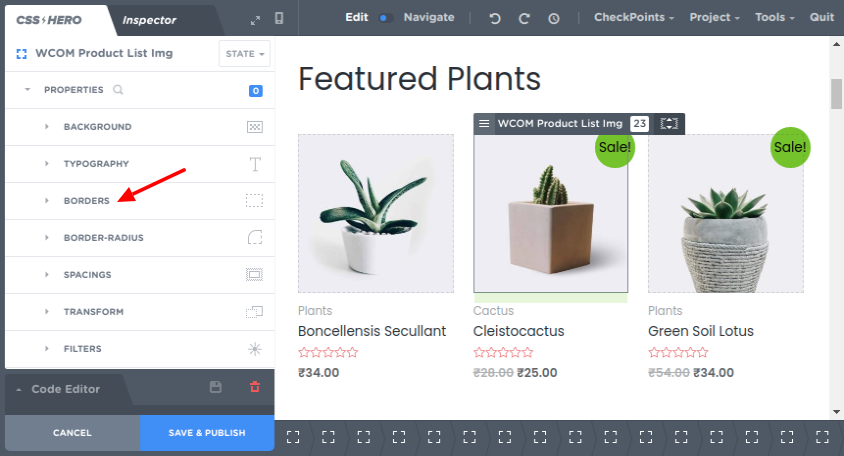
- Now choose the border-width and border-color which you want to add to your images.
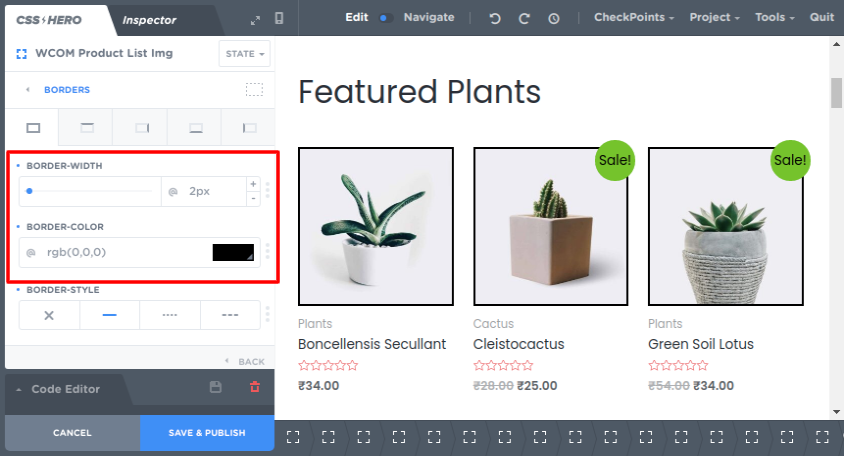
The borders are applied to all the images
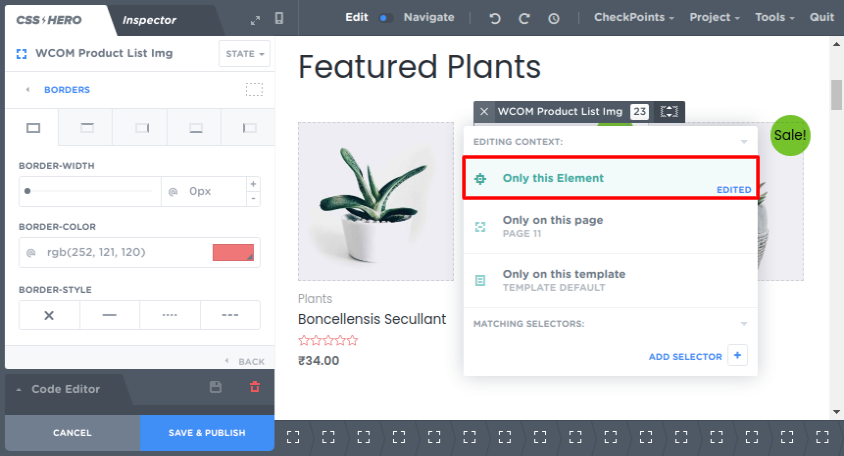
- Now, if you only want to add a border to a single image just select ‘Only this Element‘ from the hamburger menu of that particular image.
- Choose the border-width and border-color for your single image.
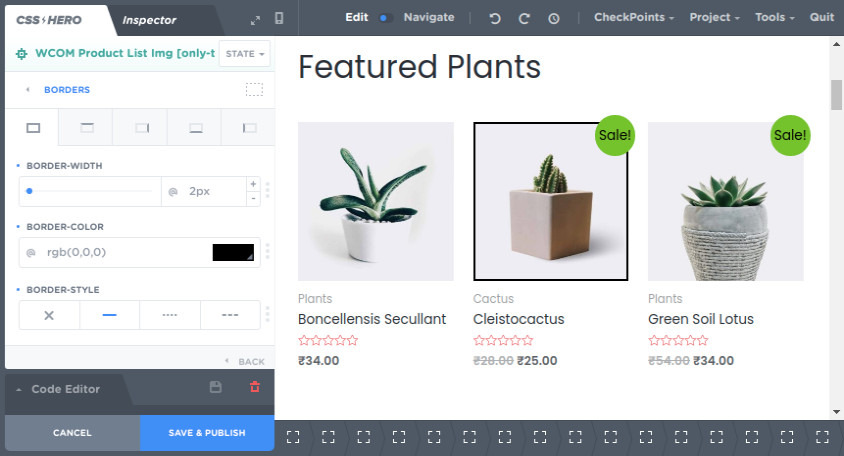
A single image has a border applied
Congratulations! You have successfully added a border to your image(s) with no coding but only using CSS Hero editor.