In this quick video you can see how easy is to customize the Job Manager application form to easily achieve a neat column aligned layout.
Here’s what you have to do:
- First of all set all the JM table rows to display : block, this basically will allow you to manage those rows as normal blocks instead of as parts of a table.
- Then what we have to do is to set them to float : left, by doing this we’re communicating the browser that we want our table rows to act as columns and be aligned vertically.
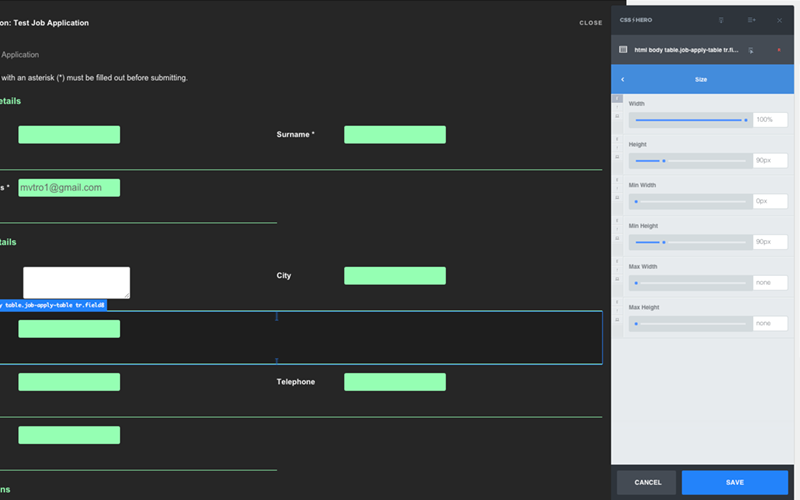
- Now we just have to decide the size of those ‘rows’ which are currently behaving as columns more than rows. In this demo video we’re setting size: 50%, this means that each ‘row’ will fit in half the available space. You can also set that value to 33% if you want them to be 1/3 or 25% to be 1/4. Please note that Hero by default provides pixel values, in this case we manually entered % values, once a value has been changed Hero will provide the new unit as default.
- You’re done, now feel free to experiment! As a bonus in this demo we’ve also set some padding to give our rows some spacing between them and a min-height value which will help us align them properly.
This will give your Job Manager application table a nice boost, however you can even go further with Hero and choose to assign each row a proper style, in order to do this what you have to do is just to communicate CSS Hero which you row you want him to identify, let’s say we want our Post Code row to be 100% for some weird reason.
As a first step we’re using Chrome’s Inspector to identify which element we’re willing to edit:
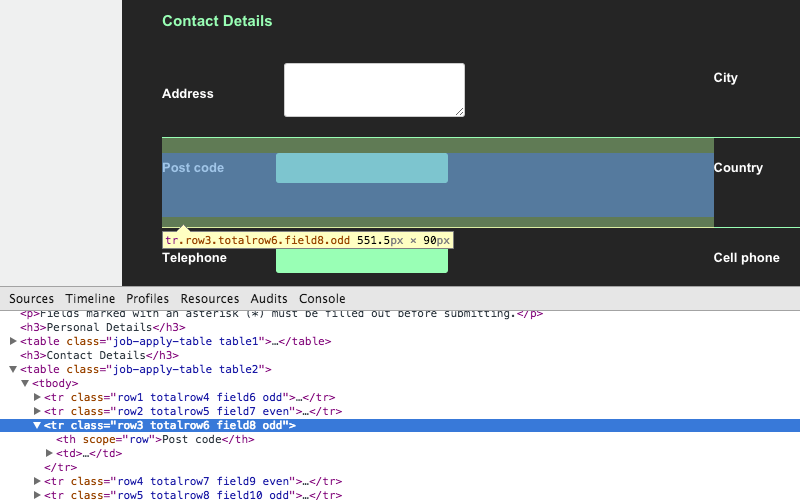
That’s the row we’re willing to edit, we’ll use the specific .field8 class which is applied only to that row. Now simply add it to CSS Hero’s Quick Config by using a quite specific selector as it follows: html body table.job-apply-table tr.field8 and you’re done!
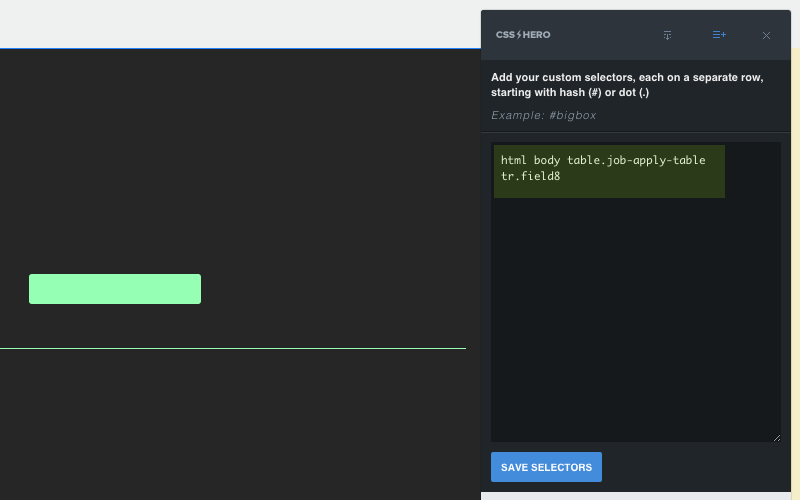
Save your new selector, once reloaded Hero will display you a custom editing box just for that field8 element, now set it to width 100% and you’re done. Of course you can provide a number of other properties to be applied to that specific block, combining Hero with Quick Config tool will allow you to get full control on your Job Manager plugin quite easily.